Longer post ahead, so grab a hot tea if you’re in the mood. If not, just scroll down to the project you’re most into. 🙂
Invitations
Somewhere between E-vites and paper invitations I landed on sending invitations via text message. So the last few years I have created an image for it while setting up my inspiration boards. This way I have exactly the shapes and colors, and so do the party-goers. I’ve even used the invite image to send out to the people making our desserts, so they’ll have exactly what I am going for for the event.

Table Signs
While I was already creating digital images I also started tinkering around with my Cricut and created a few cutout words. I only had a few tables for this party (trying to keep the packing light) so I went ahead and made the signage three dimensional. I found a groovy looking font, applied my offset in Cricut Design Space, and glued them each down.

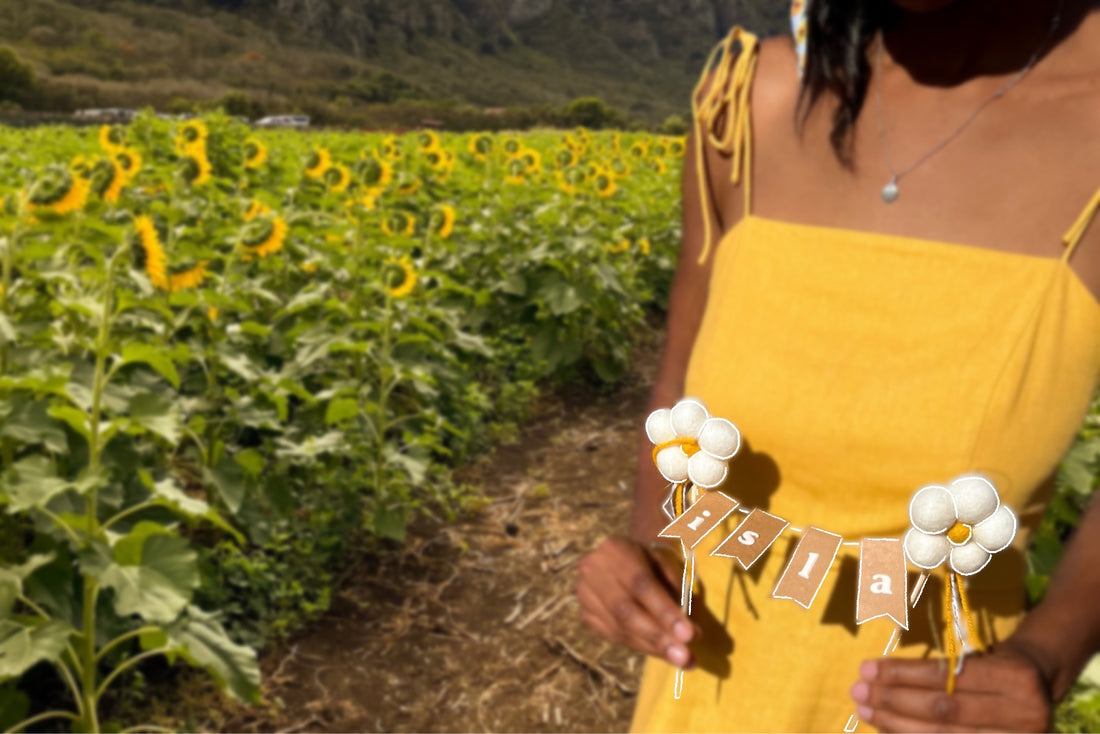
Cake Topper
I decided to make a cake topper at the last minute, when I found out our birthday party had to be pushed back by a week. The sunflowers had not been blooming as expected. That meant that my 4-year old would have to wait 9 days after her actual birthday to celebrate it with cake, and I didn’t have the heart to do that to he. So, I baked her a quick 6 inch vanilla with chocolate cream cheese frosting (she requested “a white cake with brown icing”). I did not have enough candles to use her party candles twice, so in came the cake topper idea.
I ended up stumbling across a topper I really loved on Pinterest that was $32 and would not ship to Hawaii in time. After about ten seconds of thought I realized the entire thing was made up of things we already had at the house. I grabbed two mini kebab skewers, kraft cardstock, felt balls, ribbon and yarn, hot glue, and a couple stickers and was done with this project in less than an hour.
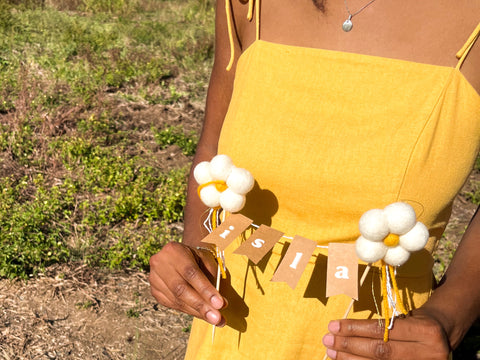
The cardstock flags were a freehand cut and then I used some old felicity jane puffy stickers to spell out “Isla”. I strung them on some old bakers twine and glued it to the skewers to secure.
The most difficult part was getting the felt balls to stick together. I ended up putting the hot glue on one side at a time, squeezing two together as their glue dried. I think it might have been more efficient to grab a rubber band to hold them together as they adhered but I was too lazy to look for one. I glued all of the white balls together in a circle first, and then glued the yellow one on top of those just to give it more dimension.
The ribbons and yarn were all little leftover scraps I had. I just tied them to the skewer and once I found good placement I glued them down.
Related Post: Party Planner Template
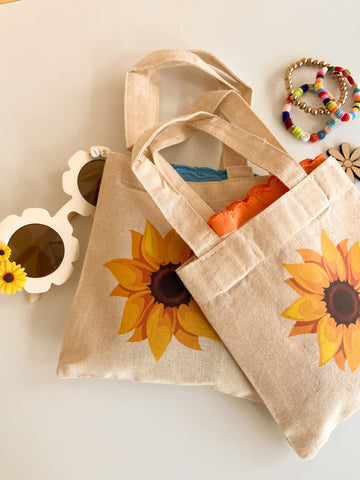
Friendship Bracelets & Sunnies
Since I was trying to keep things retro I decided to pile up on beads I used to play with as a kid. The pony beads were a little too cumbersome for me so I decided to stock up on clay beads, a pearl bracelet making kit, and those retro letter beads we all made friendship bracelets with. I got so many different styles for future use, because I’m seeing a lot of crafting in my little girl’s future — she even received a few crafting kits for her birthday.
Anyway I took the beads to a set of flower-shaped sunnies as well as made each girl a friendship bracelet.
The bracelets were used to keep their drinking waters straight. I gifted each child a disco ball filled with ice-cold water, and am so grateful I thought to do this. Otherwise the girls wouldn’t have had anything to drink until their lemonade arrived with their meals, and it was too hot a day for that!


I found this 8-pack of sunglasses which was perfect. Everywhere else I looked had them in bulk, like 20-packs. I knew I was only inviting a literal handful of girls so it didn’t make sense to have such a surplus. I went with a simple design for the sunnies: three flowers and each child’s first name. I ended up liking the placement of the first one I put together so the names all went in the same place. I did switch up where the sunflowers went surrounding the names but there was always all three sizes on each pair of sunnies.
Originally I did this project with hot glue but wasn’t liking how easily some of the beads were popping off of the sunnies. I tried E6000 glue and it has adhered the beads permanently. If you decide to go this route too, glue in a ventilated space, and give the project plenty of time to dry. I left them to dry for a day and it also helped the fumes dissipate.
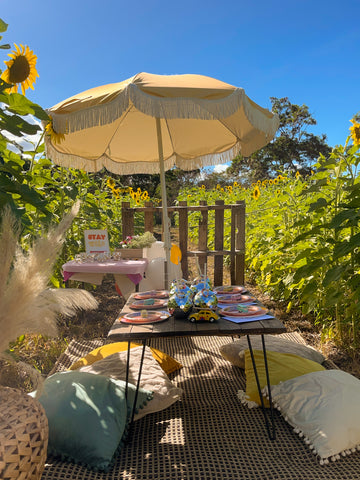
Backdrop & Photo Props
The backdrop was the DIY project I was most nervous about for some reason, it looked so daunting. The whole process turned out to be fairly easy. It was time intensive though so I am glad I did it a few weeks in advance.
First, I took my husband to the hardware store. As he looked around I asked if we need anything to make rounded cuts. Since we didn’t we grabbed a 4 x 6 foot piece of wood and had it cut in half. In one afternoon he’d had the arch cut and slapped some hinges on the two pieces of wood for me. He did this so that it would be easier to put it in my SUV for transport. Once I got a hold of the backdrop I stained and sealed it.
But of course I had to do more. I initially had just planned to Cricut some cute phrase out of vinyl to stick on but ended up deciding that I wanted a backdrop that could flow in the breeze. So I decided to lean into the retro vibes and go for fringe.

I grabbed some vinyl fencing and cut it in the shape of the arch, leaving excess to wrap it around to the back of the backdrop and attach it. The fencing was lightweight enough to hang up on my wall with three thumbtacks so I set up in my dining room in case it took a while. Spoiler alert: it took two afternoons. I cut about six table cloths into strips about 1 inch wide and looped one around each square of fencing.
I started from the bottom so it wouldn’t drag too much in the dirt. At first I was filling each square with a loop strip but it was looking too full, so I switched to every other square. (Looking at the photos now, I probably would have doubled back up again towards the top, some spaces looked sparse up top.) I popped in a true crime podcast and pumped out over half on the first evening. It was quite relaxing.

While creating the text for the table signs I ended up cutting too many letters. Instead of throwing them into the recycling bin I decided to make them into photo props first. I forgot to take pictures of all of them but I ended up making pennet flag style props with sentiments like “stay wild”, “flower child”, “4”, and “happy birthday isla”. I hot glued the letters onto cardstock I cut into triangles, and then glued that down to kebab sticks with hot glue.
Party Activities
All of the mom’s favorite part of the party was easily the floral arrangements. We all were crowding around trying to get photos of our little girls hard at work. Each child was so enthralled and super proud of their work. Plus, the vases being so tiny, it was hard not to look cute.
I walked through Salvation Army and found a handful of of small candle holders and miniature vases for less than $10. After giving them a good scrub I hot glued some sunflower ribbon onto each, and that was it! I set up the table with the vases, a basket of flowers, water, scissors, and a small sign. Incredibly worth the effort.

I almost always create a coloring page for my kids’ birthday parties at this point. They are perfect for when the children are getting too overwhelmed or too sweaty. I have found that it’s also easier to print them on smaller and thicker paper, so this time I printed them on some leftover 5 x 7 white card stock. It actually stood up pretty well so I’ll probably continue this from now on. It was a great size but it also sturdy against those rough hands.
Related: Stay Wild Flower Child Coloring Page Printable